Manufacturer | |
---|---|
Series |
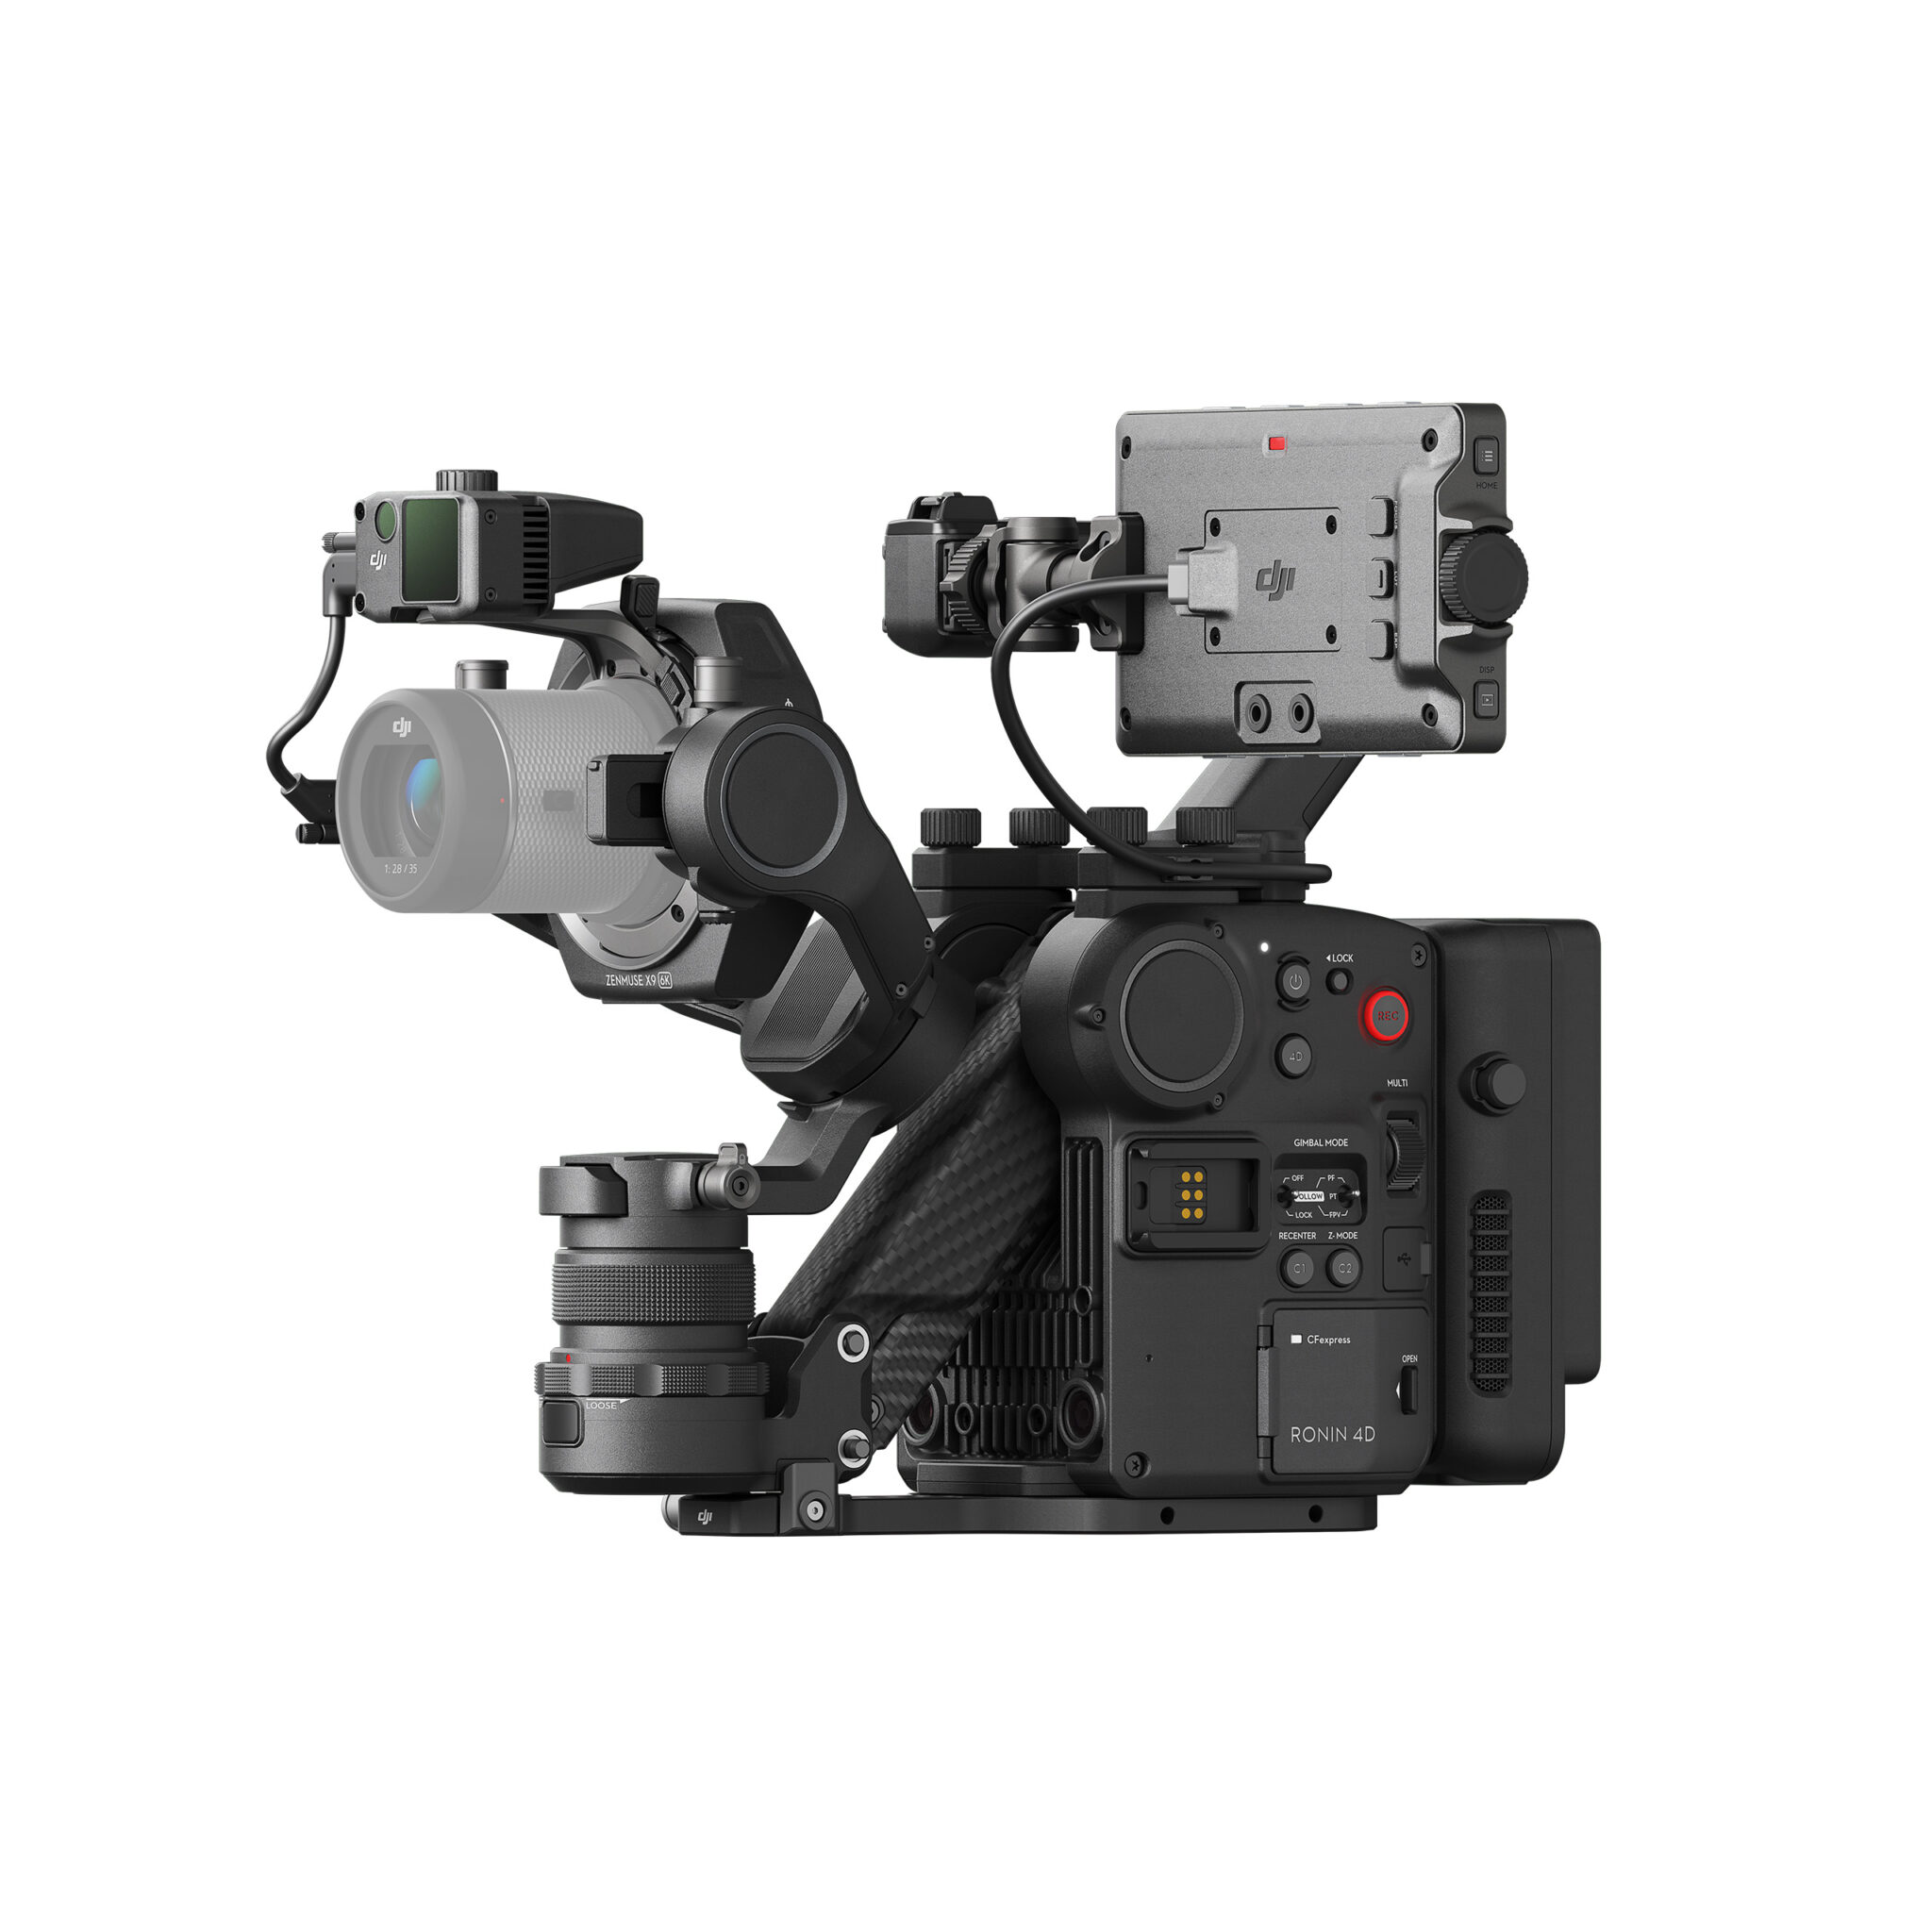
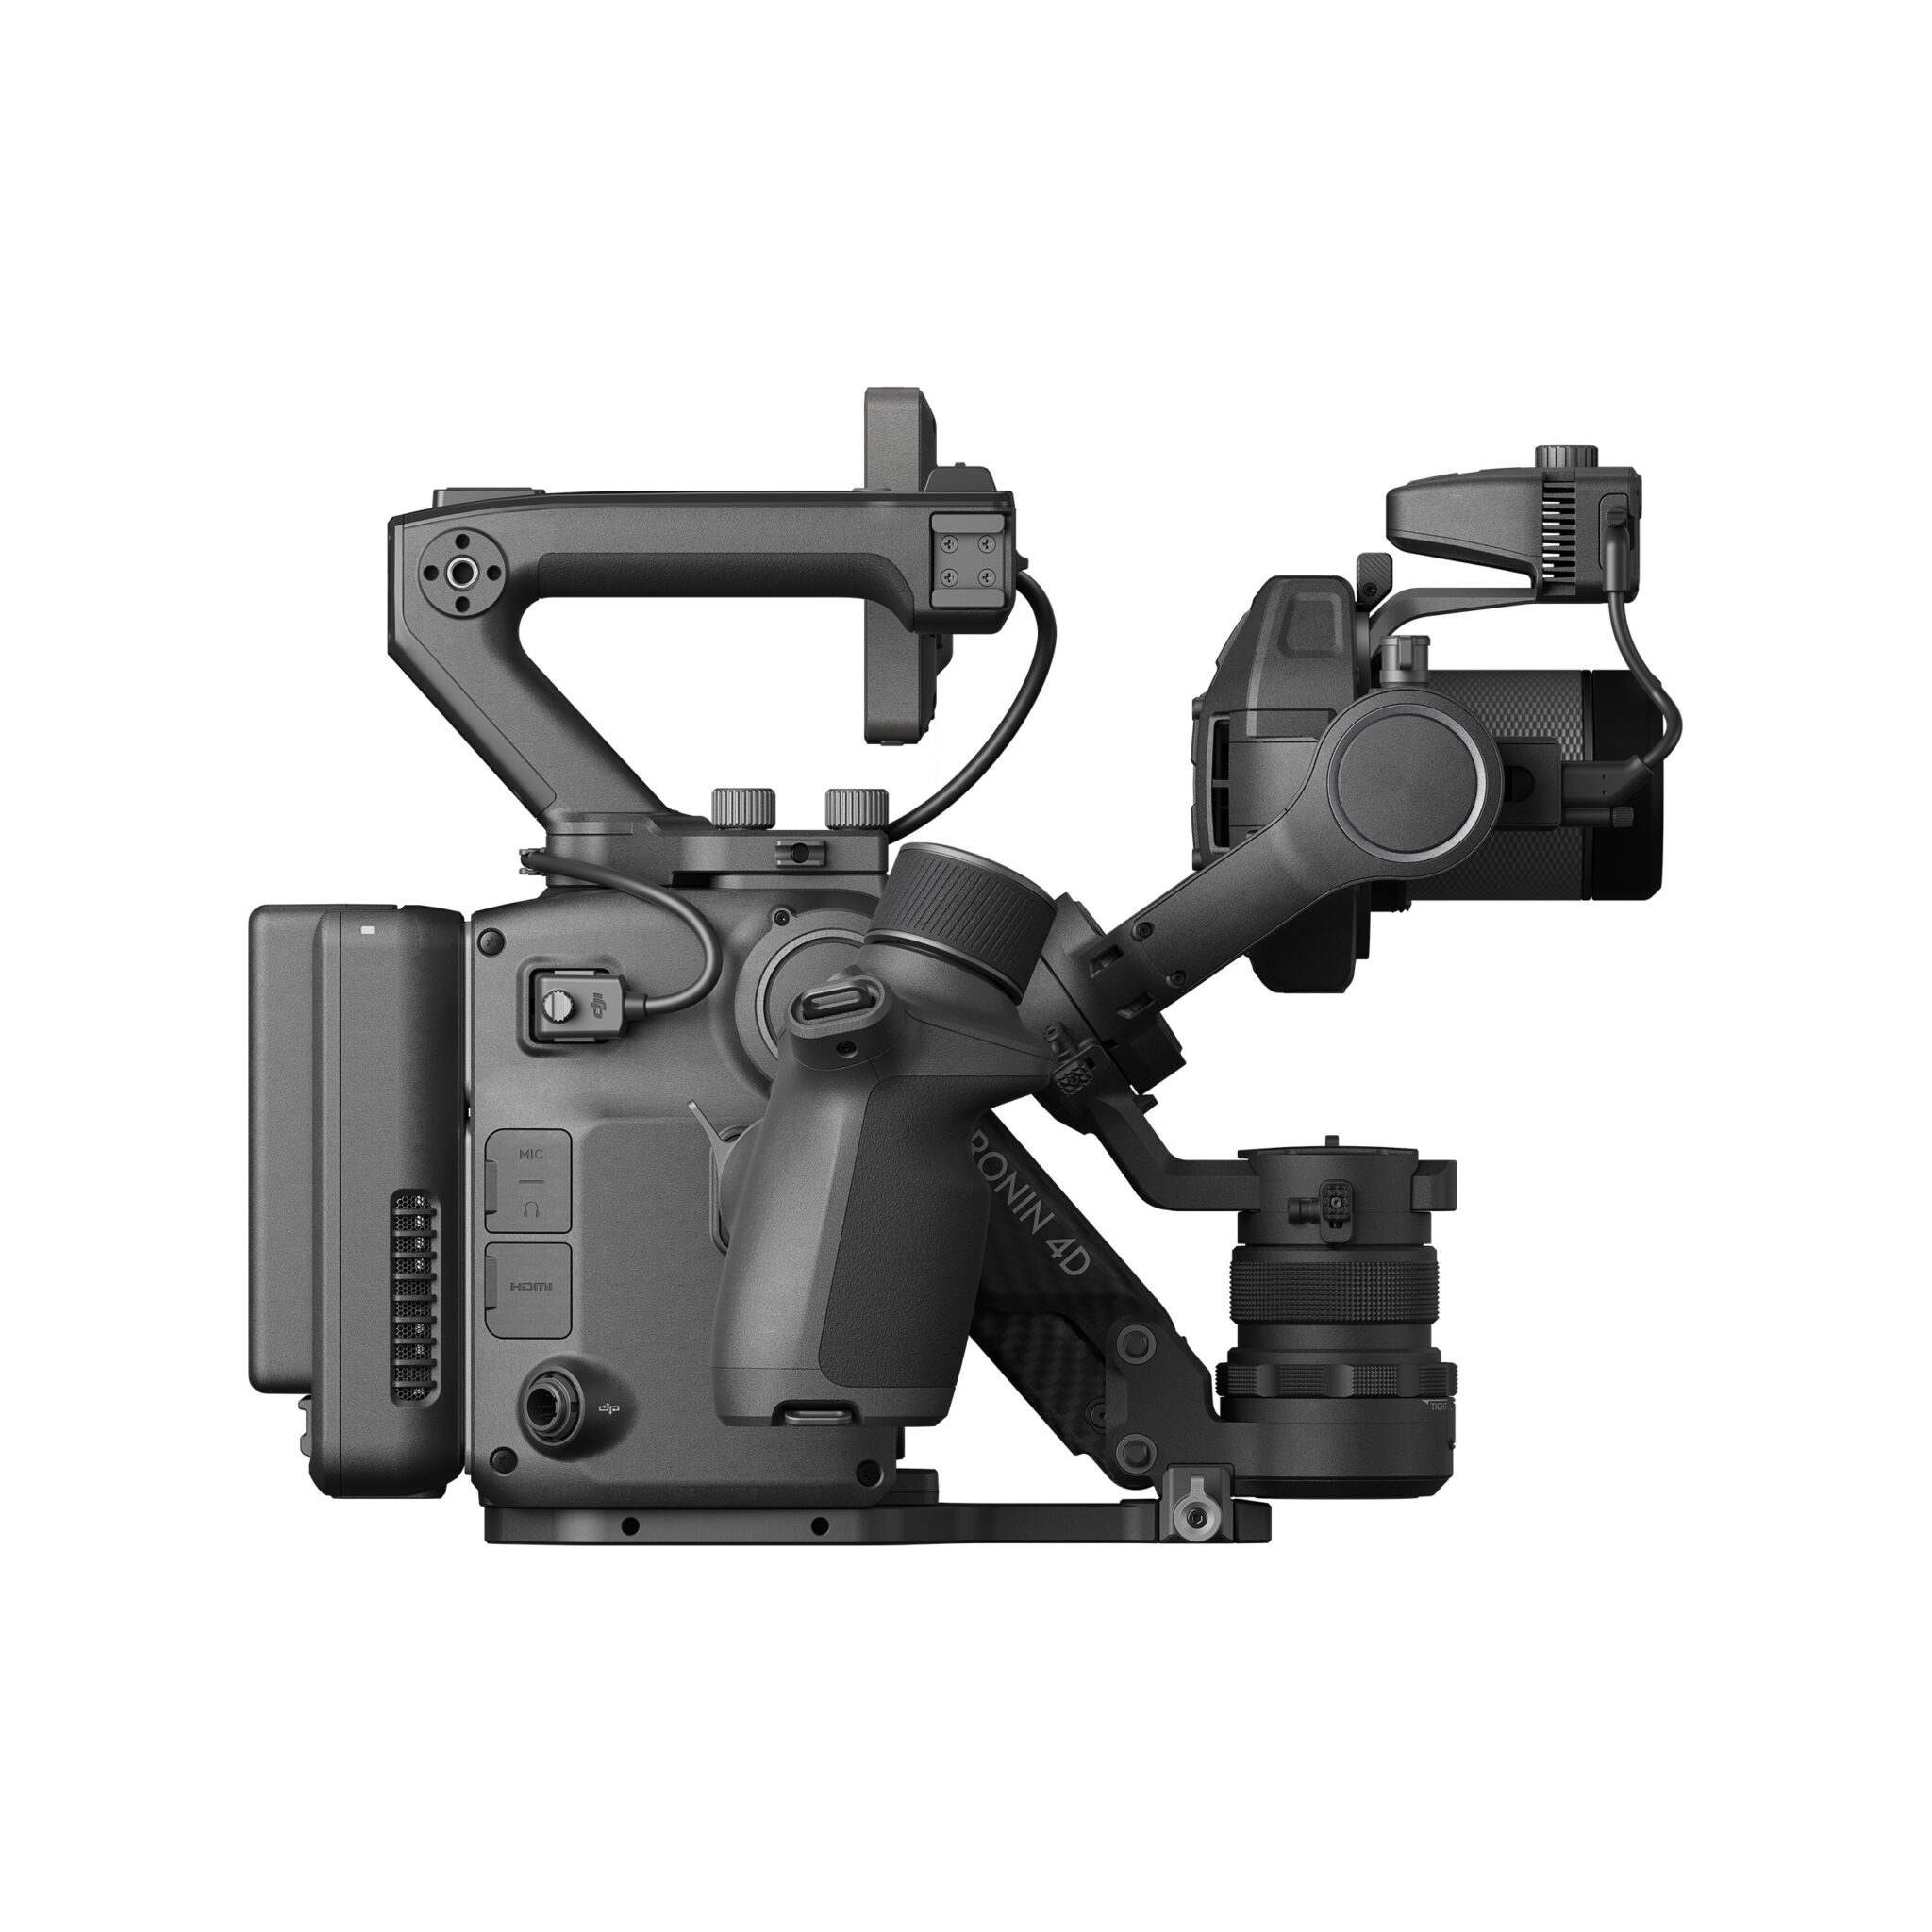
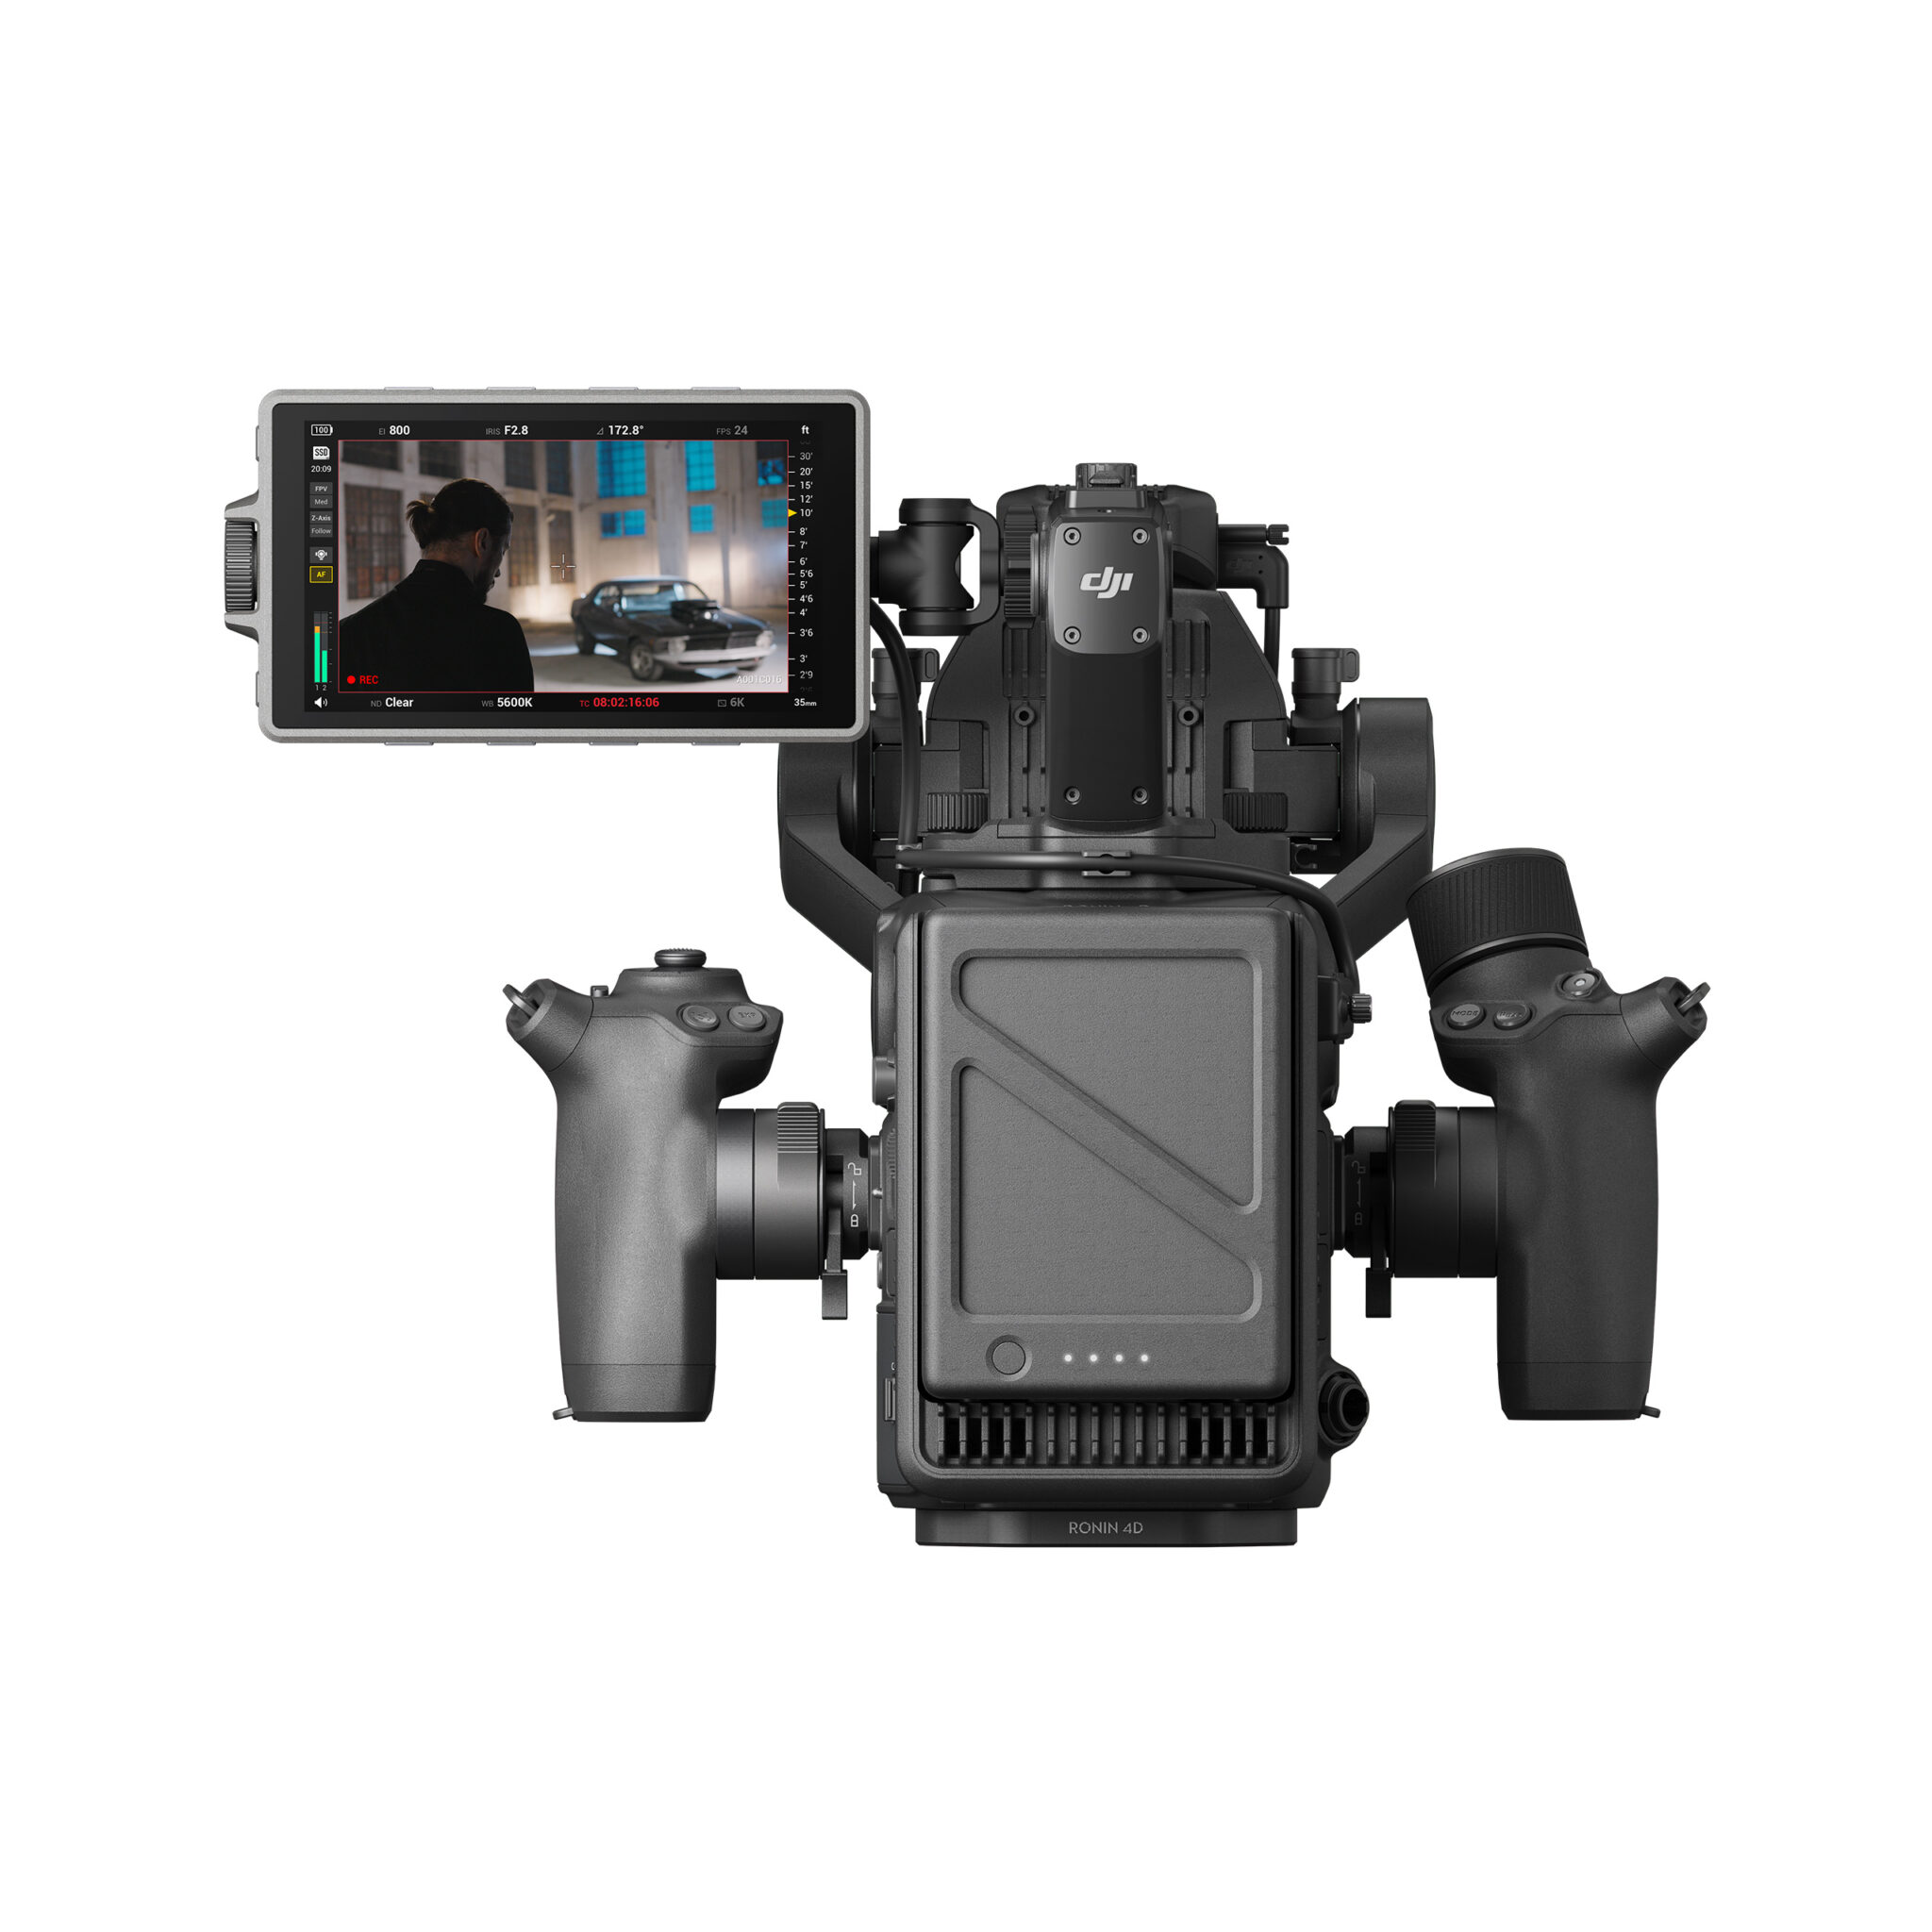
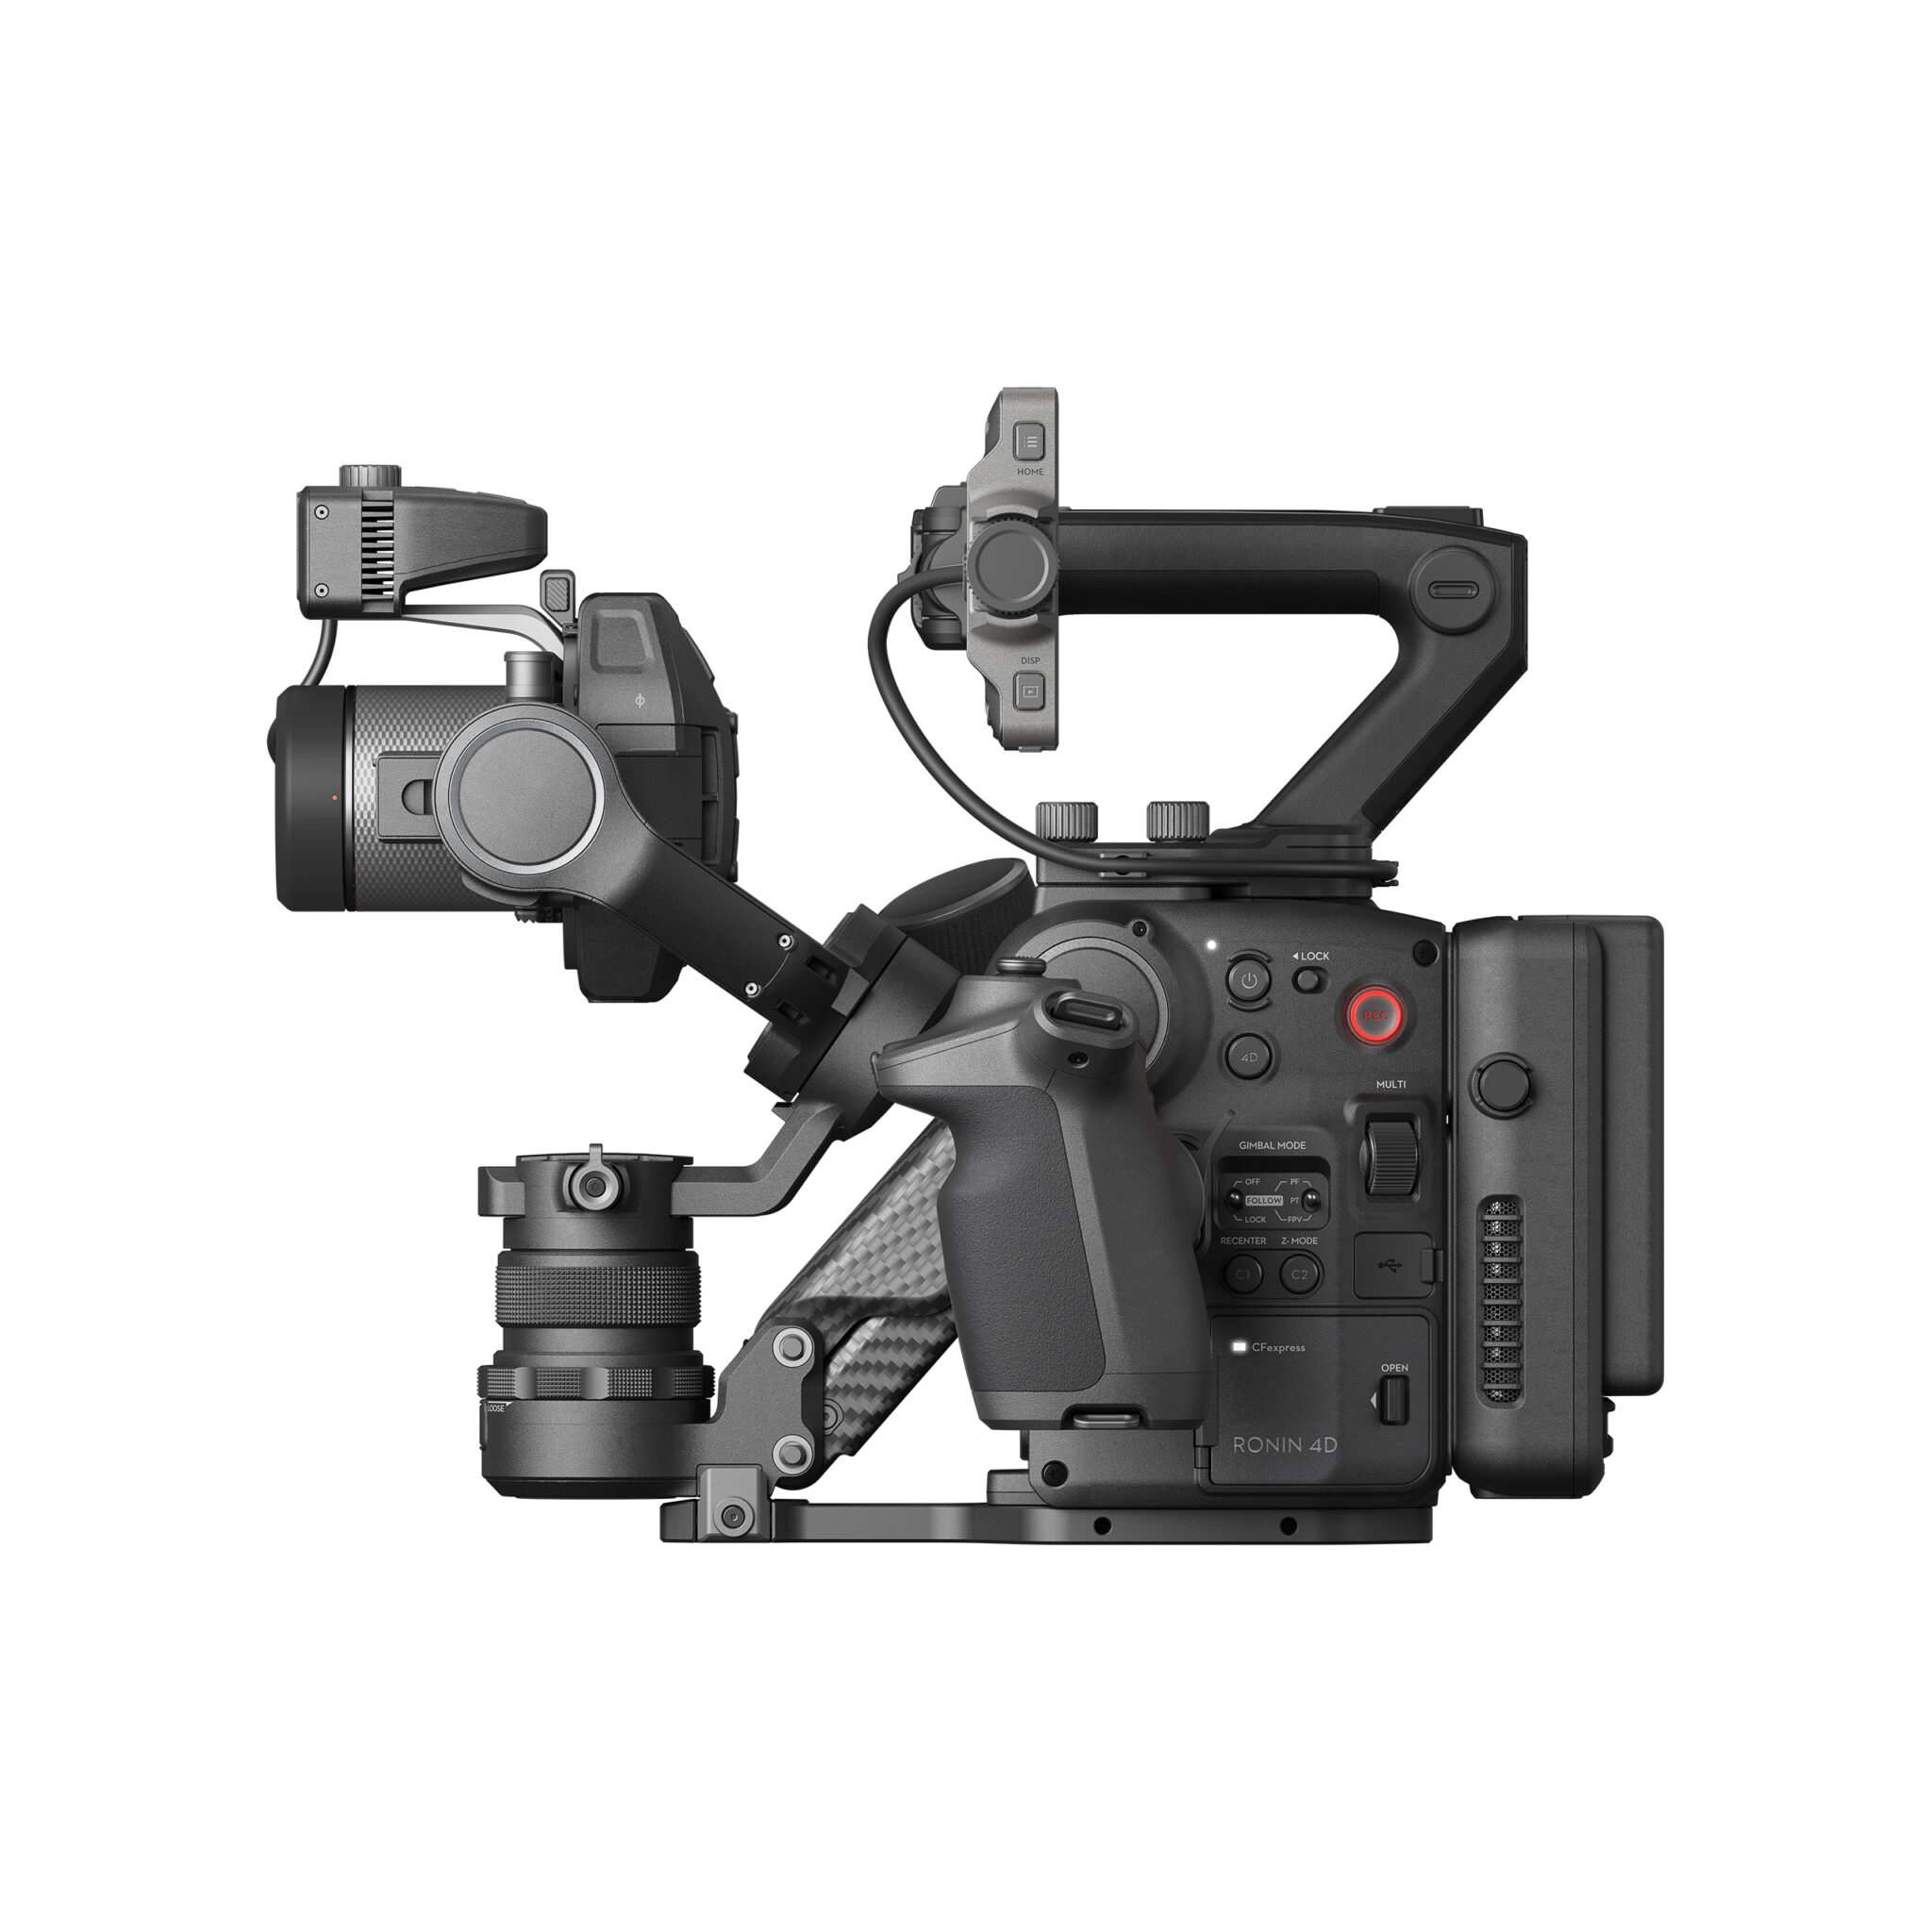
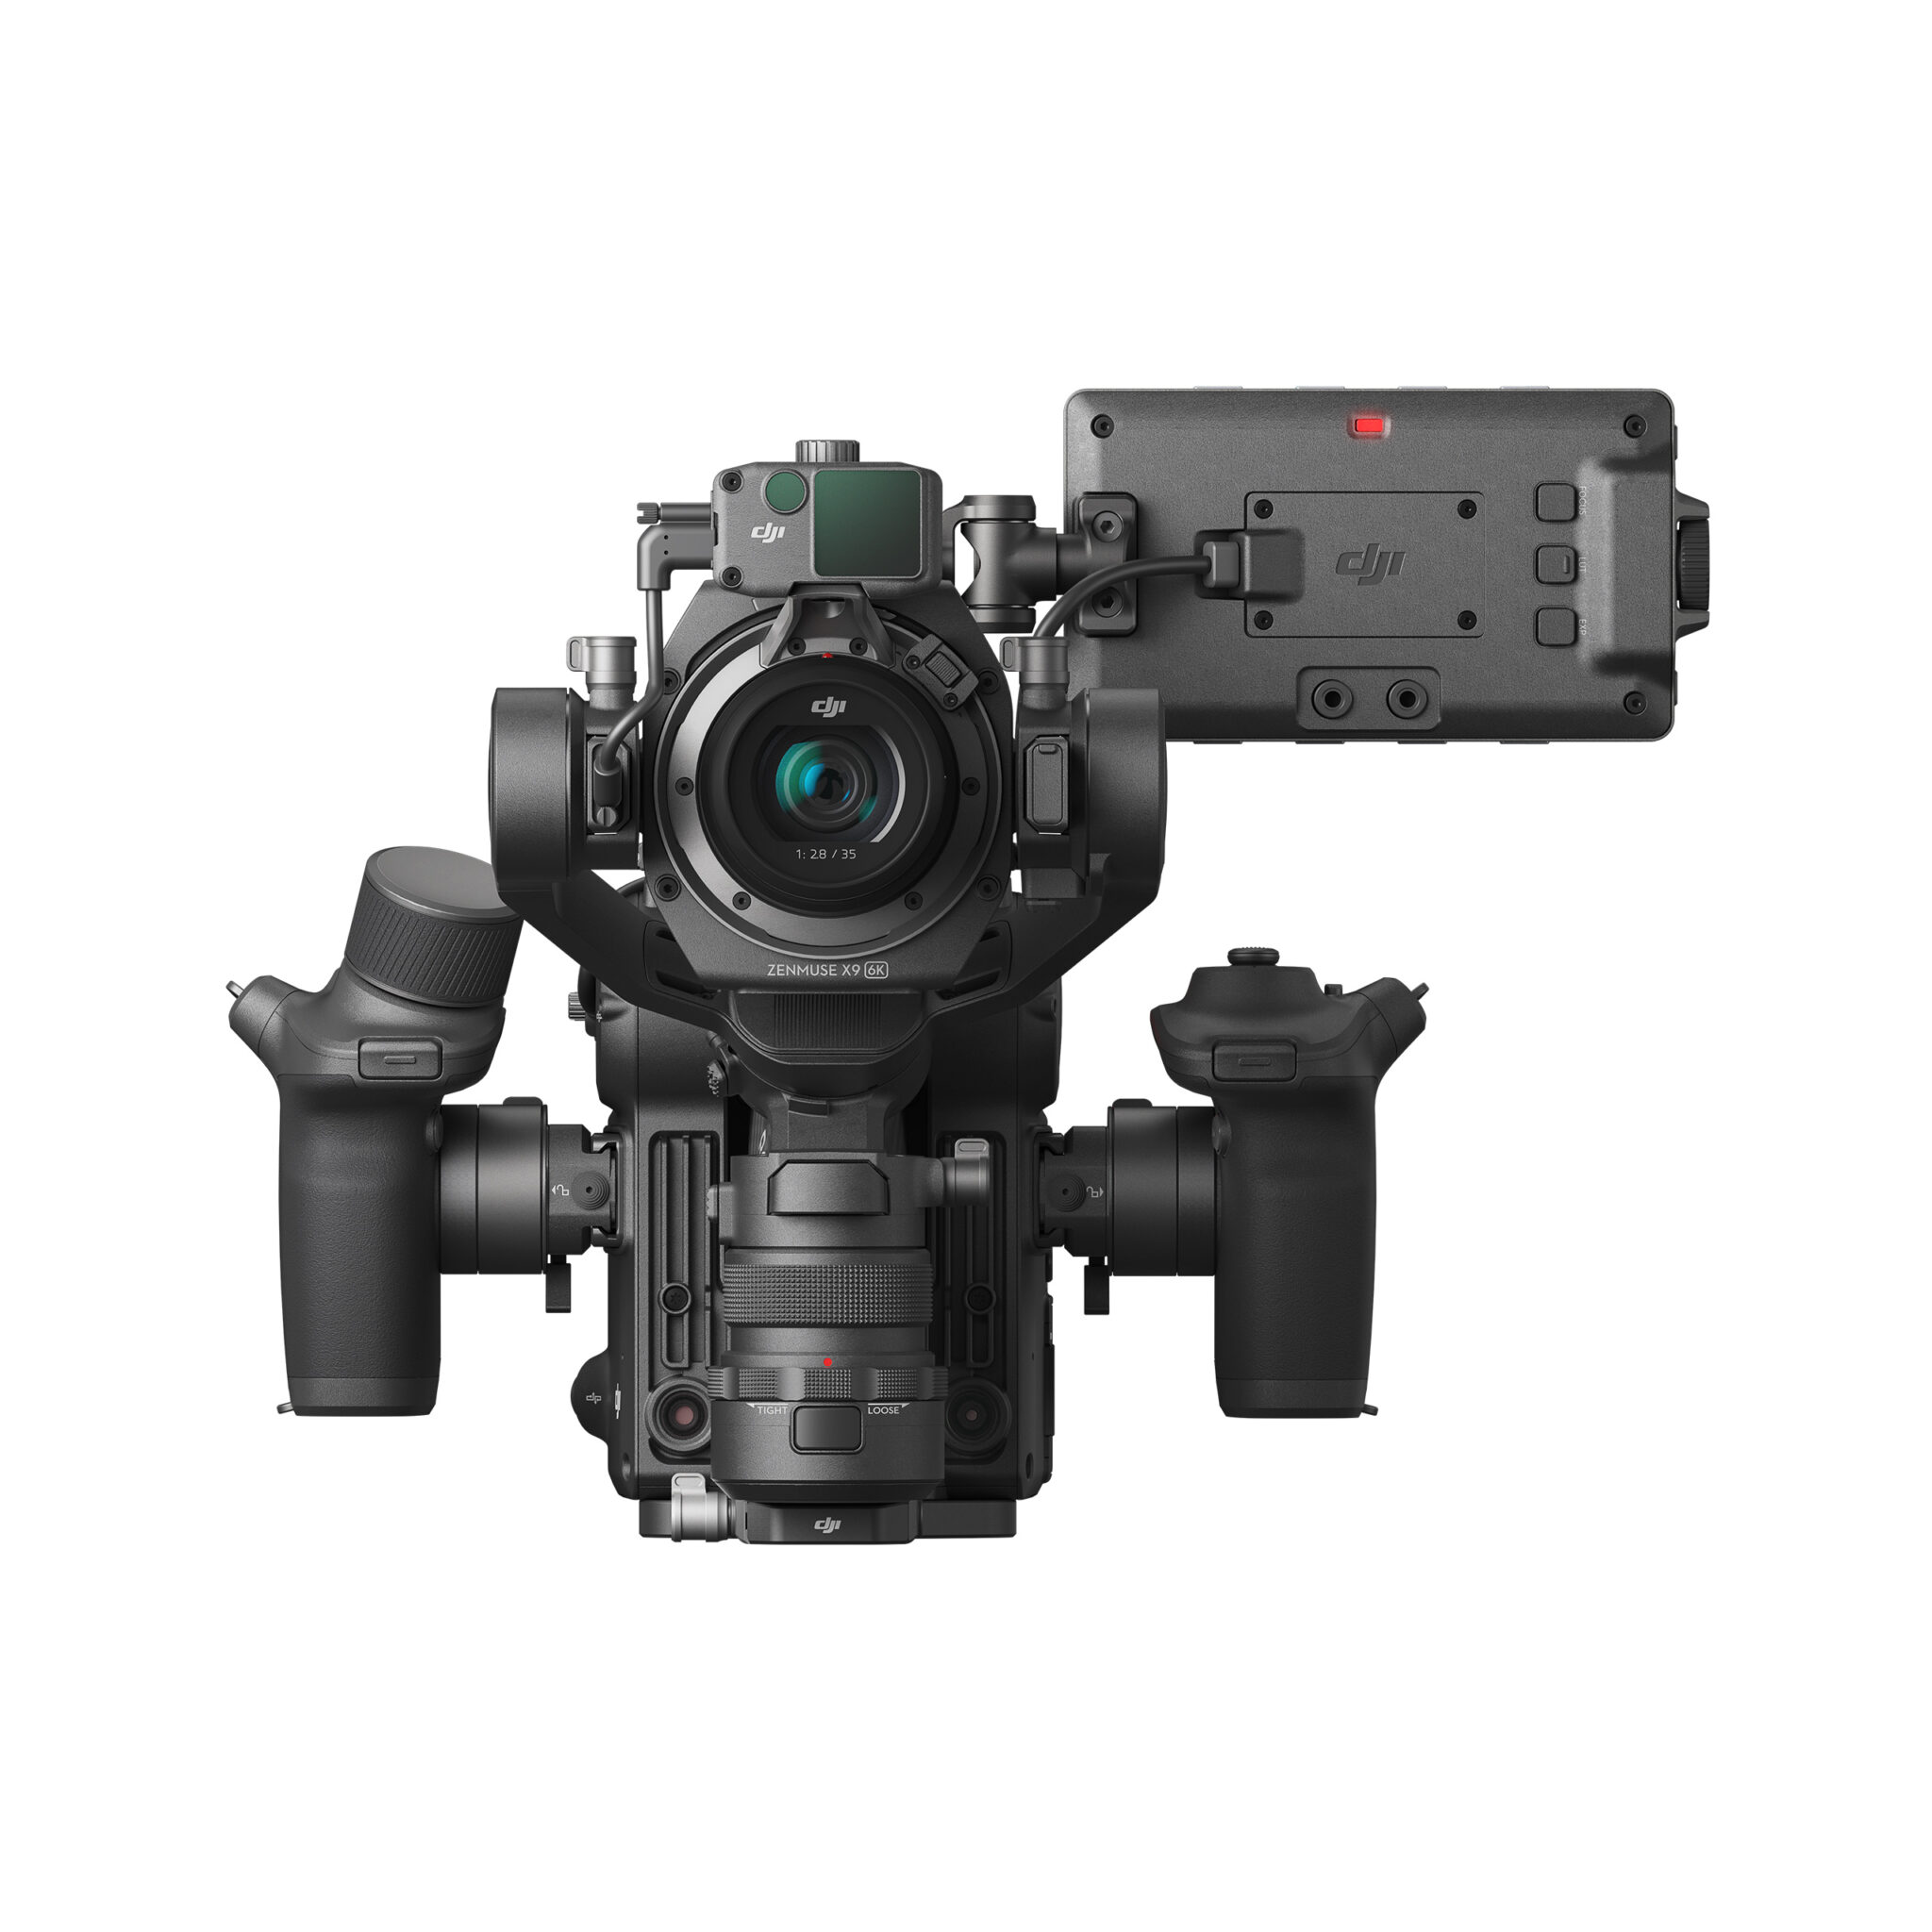
DJI Ronin 4D – 6K
6,599.00€
- Highly Integrated Modular Design
- Full-Frame Gimbal Camera
- 4K/120fps Internal RAW Recording
- 4-Axis Active Stabilization
- LiDAR Focusing
- Wireless Transmission and Control System
Küsi meilt pakkumist!
Available on backorder
KKK
Mitu versiooni DJI Ronin 4D-l on? Millised on nende erinevused? |
DJI Ronin 4D-l on kaks versiooni: 6K Combo ja 8K Combo. Mõlemad kombinatsioonid sisaldavad erinevate spetsifikatsioonidega X9 gimbal-kaameraid. 6K Combo sisaldab X9-6K Gimbal kaamerat, mis toetab video salvestamist eraldusvõimega kuni 6K, ja 8K Combo sisaldab X9-8K Gimbal kaamerat, mis toetab video salvestamist eraldusvõimega kuni 8K. Võrreldes 6K Comboga on 8K Combol täiendav PROSSD 1 TB, USB-C-USB-C kaabel, PROSSD kinnitus ja muud tarvikud. Kaasasolevate esemete üksikasjaliku loendi leiate jaotisest DJI Ronin 4D “mis on karbis”. |
Millest on DJI Ronin 4 D põhikorpus valmistatud? |
DJI Ronin 4D põhikorpus on valmistatud alumiinium-magneesiumisulamist ja Z-telje õlg süsinikkiust. |
Kas DJI Ronin 4D on veekindel? |
Ei. DJI Ronin 4D põhikorpus ei ole vee- ega tolmukindel. Kahjustuste vältimiseks hoidke kasutamise ajal veest ja tolmust eemal. |
Mis on DJI Ronin 4D põhikorpuse HDMI-pordi kõrgeim videoväljundi spetsifikatsioon? |
Põhikorpuse HDMI-port toetab väljundit kuni 1080p/60 kaadrit sekundis. Hilisem püsivara värskendus toetab 4K/60 kaadrit sekundis väljundit. |
Kuidas aktiveerida DJI Ronin 4D ja selle tarvikuid? |
DJI Ronin 4D ja kõik tarvikud tuleb aktiveerida DJI Assistant 2 (Ronin Series) kaudu. Enne aktiveerimist veenduge, et kõik aktiveerimist vajavad seadmed on DJI Ronin 4D külge ühendatud, vastasel juhul ei pruugi see teatud osade inaktiveerimise tõttu korralikult töötada. Aktiveerimise sammud: 1. Veenduge, et põhikorpuse lukustusnupp on lukustamata asendis. Sisselülitamiseks vajutage ja hoidke all toitenuppu. Enne sisselülitamist veenduge, et aku, X9 gimbalikaamera, LiDAR-i vahemikuotsija, X9 fookusmootor ja kõik aktiveerimist vajavad lisaseadmed on korralikult paigaldatud ning kõik kolm X9 gimbali telge on lukustamata. 2. Kasutage komplekti kuuluvat USB-A–USB-C andmekaablit, et ühendada arvutiga USB-C-port, mis asub põhikorpuse mälukaardi pesa kohal. Seejärel käivitage DJI Assistant 2 (Ronin Series). 3. Logige sisse oma DJI kontoga. Valige rakenduses DJI Assistant 2 (Ronin Series) Ronin 4D ja järgige aktiveerimiseks juhiseid. Aktiveerimise ajal ärge seadmeid välja lülitage ega lahti ühendage. Üksikasjalike juhiste saamiseks vaadake DJI Ronini 4D õpetust – esimene kasutamine. |
Kuidas määrata DJI Ronin 4D kasutajaliidese keelt? |
Lülitage Ronin 4D sisse, vajutage menüüsse sisenemiseks üks kord High-Bright põhimonitori menüünuppu. Ronin 4D kasutajaliidese keele muutmiseks puudutage Süsteem ja seejärel Keel. Praegu on saadaval hiina ja inglise keel. |
Millised seadmed ühilduvad kaugjuhtimispuldiga DJI Ronin 4D-ga? |
DJI Ronin 4D supports remote control with DJI Master Wheels, DJI Force Pro*, and with the left and right grips attached the High-Bright Remote Monitor. Internal motion control is also supported using the High-Bright Remote Monitor.*
* Using DJI Ronin 4D with DJI Master Wheels and DJI Force Pro requires the High-Bright Remote Monitor and Remote Monitor Expansion Plate. Please refer to the tutorial video Connecting DJI Ronin 4D with DJI Master Wheels and DJI Force Pro. Motion control with the High-Bright Remote Monitor is currently unavailable and will be supported through a future firmware update. Please stay tuned to the official website for more information. |
Kuidas ühendada DJI Ronin 4D DJI Master Wheelsi või DJI Force Pro-ga? |
Connecting DJI Ronin 4D with DJI Master Wheels or DJI Force Pro requires the High-Bright Remote Monitor, High-Bright Remote Monitor Controller Cable, and High-Bright Remote Monitor Expansion Plate.
1. Before using, update the firmware of DJI Master Wheels and DJI Force Pro to the latest version. See detailed steps in the after-sales tutorial video Firmware Update. 2. Mount the High-Bright Remote Monitor Expansion Plate to the back of the remote monitor (detach the protective cover before installation). 3. Use the High-Bright Remote Monitor Controller Cable to connect the DC-OUT port of DJI Master Wheels or DJI Force Pro with the DC-IN port of the High-Bright Remote Monitor Expansion Plate. 4. Press and hold the linking button on the 4D Video Transmitter for 5 seconds to enter Linking mode, and tap ··· on the High-Bright Remote Monitor, select Connection Settings, then Link to Control Monitor A to link with Ronin 4D. Once linking is done, you can begin controlling. |
Kas DJI Ronin 4D sisaldab GPS-moodulit? |
Ei. |
Mitut helisisendit DJI Ronin 4D toetab? Kas see toetab XLR-sisendeid? |
DJI Ronin 4D toetab praegu helisisendit 3,5 mm mikrofonist/pistikust, toitemikrofonist/liinisisendist ja sisseehitatud 2-kanalilisest mikrofonist. XLR-sisend pole praegu saadaval.* * XLR-sisend on saadaval 4D laiendusplaadi kasutamisel. |
Kas DJI Ronin 4D-l on nupp HOLD, et vältida juhuslikke puuteprobleeme? |
Ronin 4D vasakul küljel on lüliti LUKUSTUS. Ronin 4D menüü ja nuppude funktsioonide lukustamiseks võite vajutada noolega näidatud lülitit, mis takistab sellel mis tahes toimingute sooritamist, sealhulgas sisse- ja väljalülitamist. |
Millised DJI Ronini 4D lisaseadmed toetavad kiirvahetust? |
Välja arvatud X9 Gimbal-kaamera ja LIDAR-i vahemikuotsija, toetavad suure eredusega põhimonitor, ülemine käepide, objektiiv, objektiivi kinnitused, PROSSD, käepidemed ja X9 fookusmootor kuumvahetust. |
Kas DJI Ronin 4D toetab kolmandate osapoolte akusid (nt laialdaselt kasutatavat V-kinnitusega akut)? |
Hetkel ei. |
Kas suure eredusega põhimonitori saab kasutada kolmanda osapoole kaablite või muude DJI USB-C–USB-C kaablitega? |
Ei. |
Kas suure heledusega põhimonitor toetab ekraanilukku ja puhkerežiimi? |
Ekraani saab lukustada (põhikorpusel oleva nupuga LOCK), kuid sellel puudub puhkerežiim. |
Kas DJI Ronin 4D vasak ja parem käepide on vahetatavad? |
Ei. |
Millist laadijat TB50 laadimisadapter toetab? |
Laadimisadapter TB50 toetab praegu tavalist 86 W toiteadapterit ja Inspire 2/Ronin 2 180 W akulaadijat. |
Mille jaoks on TB50 laadimisadapteril kaks kruvi? |
When shooting for long durations, you can detach the battery mount and connect it directly to the battery mount power port (female) on the main body, or the one on the back of the 4D Video Transmitter via the charging adapter, and then tighten the two screws.
Please note that when charging DJI Ronin 4D directly with the charging adapter, the Z-axis may not function properly due to power limitations. |
Kuidas paigaldada ja kasutada objektiivi kinnitusi? |
1. Press the unlock lever of the lens mount and rotate counter-clockwise to remove the standard DL mount of X9.
2. Insert the mount you need into the X9 gimbal camera, tighten the lever lock and then install the lens. |
Kas WB37 akulaadimisjaotur (USB-C) toetab kolmandate osapoolte toiteadaptereid? |
Yes. However, third-party adapters have different charging power levels and charging times, so it is recommended to use the standard power adapter. |
Kas Ronin 4D põhikorpuse USB-C-pordid ja suure eredusega kaugmonitor pakuvad toiteallikat? |
Hetkel ei. |
Kuidas ma saan DJI Ronin 4D-ga aegluubis pildistada? |
On the main monitor, tap FPS to open frame rate settings menu, enable SLO, and set the frame rate for PROJECT and SENSOR. PROJECT refers to the frame rate of the project and SENSOR refers to the frame rate of shooting. When the sensor frame rate is at least twice the project frame rate, you can record slow-motion videos. |
Kas DJI Ronin 4D suudab iirise astmeteta reguleerida? |
Yes, you can use the iris control slider on DJI Three-Channel Follow Focus or use the Mode button of the right hand grip to assign the focus wheel with iris control and achieve stepless iris adjustment.
*Currently only available for lenses with built-in electronic aperture on the compatible lens list. |
Kuidas importida või kustutada DJI Ronin 4D LUT-sid? |
To import LUTs:
1. Copy the 33-point LUT file with suffix “.CUBE” to the root directory of the storage medium, and then mount the medium to the main body. 2. Press the HOME button once to enter the menu, tap Display and then LUT File Settings under the LOOK tab. 3. Tap Import to view LUT files in the storage medium, select the LUT file you need and tap Import again. After importing, tap Cancel to return to the previous menu and check updates on the LOOK list. 4. Ronin 4D supports reading and display of up to 16 LUT files. Tap Exit to exit LUT settings. The custom LUT files have been imported to LOOK. Tap LOOK and select the LUT file you need. *Please name the file with letters, numbers and underscores.Deleting a LUT:1. Press the HOME button once to enter the menu, tap Display and then LUT File Settings under the LOOK tab. 2. Select existing LUT file that you need to delete, tap Delete and confirm deletion, then tap Exit to go back to the previous menu and check the updated LOOK list. |
Kuidas reguleerida jälgimise ja salvestamise LUT-sid? |
Monitor LUT:
1. Press the HOME button once to enter the menu, go to Display – Monitor – Monitor LUT, and select the desired LUT. 2. Rec.709, HLG. D-Log, and custom LOOK options are provided by default. 3. To use your custom LUT, select the Monitor tab, select Monitor LUT, and then select LOOK. 4. Then select the LUT file you need in Display – LOOK – LOOK list. 5. After setting the monitor LUT, you can enable or disable LUT through the LUT button on the back of the High-Bright Main Monitor.Recording LUT: 1. Press the HOME button once to enter the menu, go to Recording – Monitor – Rec LUT and select the LUT you need. 2. Rec.709, HLG, D-Log, and custom LOOK options are provided by default. 3. To customize monitor LUT, import the LUT you need and select LOOK in Monitor LUT. 4. Select the LUT file you need in Monitoring – LOOK. 5. After setting the LUT, you can select recording LUT through Recoding – Rec LUT. |
Mis on DJI Ronin 4D loodud erinevate videote konteineri formaat. |
All in MOV. |
Milliseid objektiive Zenmuse X9 toetab? |
Please check the Lens Compatibility List. |
Kui suur on Zenmuse X9 Gimbal kaamerate efektiivne pikslite arv? |
The effective pixel number of Zenmuse X9-8K is 35.4 MP and X9-6K offers 24.1 MP. |
Millised muud DJI tooted ühilduvad Zenmuse X9 Gimbal kaameraga? |
Currently, the Zenmuse X9 Gimbal Camera is only compatible with DJI Ronin 4D. |
Kuidas Zenmuse X9 objektiivi kalibreerib? |
Please refer to the after-sales tutorial video Focus Point Control |
Kas Zenmuse X9 toetab portreerežiimi? |
Hetkel ei. |
Milliseid mittelineaarseid redaktoreid H.264, Apple ProRes ja Apple ProRes RAW toetavad? |
H.264:
DaVinci Resolve Studio, Premiere Pro, Final Cut Pro, Avid Media Composer, Baselight, Assimilate Scratch, and Edius.Apple ProRes: DaVinci Resolve Studio, Premiere Pro, Final Cut Pro, Avid Media Composer, Baselight, Assimilate Scratch, and Edius.Apple ProRes RAW: Premiere Pro, Final Cut Pro, Avid Media Composer, Baselight, Assimilate Scratch, and Edius. |
Kas X9 gimbalkaamerad toetavad DL-S 16mm F2.8 ND APSH objektiive? |
Ei. |
Kas ma saan Ronin 4D-ga pilte teha? |
Ei. |
Milleks on ette- ja allapoole suunatud binokulaarsed nägemisandurid ja allasuunatud ToF? |
Forward and downward binocular vision is used for visual positioning, and the downward ToF is used for providing height information for the Z-Axis. |
Millised on ette- ja allapoole suunatud binokulaarse nägemisandurite ning allasuunatud ToF-i kasutusstsenaariumid? |
The forward and downward binocular vision sensors are suitable for scenarios with ample sunlight and texture details, while the downward ToF is more suitable for scenarios that feature objects with low reflectivity. |
Mis on DJI Ronin 4D allapoole suunatud ToF efektiivne mõõtekõrgus? |
The effective measurement height is within 4 m for objects with reflectivity >30%, and within 2.5 m for reflectivity >7%. |
Mille poolest ActiveTrack Pro erineb eelmistest ActiveTracki versioonidest? |
DJI’s proprietary computer vision, deep learning technology, and the robust computing power of CineCore 3.0 allow ActiveTrack Pro to support the reliable tracking of almost any subject. It can effectively recognize human faces, heads, shoulders, and even arms and legs. Continuous tracking of people is available even from longer distances. You can now attain tracking shots effortlessly and even adjust composition at any time during tracking. |
Kas X9 gimbal toetab ülevalt alla salvestamist? |
Yes, but the Z-axis is not available in underslung mode. |
Kas Z-telg toetab allavõetud pildistamist? |
Ei. |
Millele peaksin Z-telje kasutamisel tähelepanu pöörama? |
1. Before using the Z-axis, make sure the axis lock on the base plate is unlocked and the Z-axis is balanced. For balancing, please refer to the after-sales tutorial video Balancing.
2. To make the best use of the Z-axis, try to hold the Ronin 4D upright during use. 3. The Z-axis is not waterproof or dustproof. Please keep away from water and dust during use. |
Kuidas installida ja kasutada LiDAR Range Finderit? |
Please refer to the after-sales tutorial video Focus Point Control. |
Kas ma pean LiDAR-i vahemikuotsijat kalibreerima? Kui jah, siis kuidas? |
The LiDAR Range Finder is ready to use without the need for calibration. |
Milliste toodetega saab LiDAR Range Finder töötada? |
The LiDAR Range Finder currently only supports DJI Ronin 4D. |
Kuidas LiDAR Range Finder teravustab? |
Ronin 4D uses LiDAR focusing. The LiDAR Range Finder can cast 43,200 ranging points. |
Mille poolest erineb LiDAR Range Finder DJI RS 2 3D teravustamissüsteemist? |
The 3D focusing system of DJI RS 2 uses single-point focusing that only focuses on the center of the target, while the LiDAR Range Finder can cast 43,200 ranging points, enabling faster and more accurate focusing and providing visual focusing with the LiDAR Waveform. |
Kuidas paigaldada ja kasutada X9 fookusmootorit? |
Please refer to the tutorial video: Focus Point Control. |
Kas X9 Focus Motor toetab kahte samaaegselt paigaldatud ja kasutatavat fookusmootorit? |
Hetkel ei. |
Kas X9 Focus Motor peab vahemikku kalibreerima ja kui jah, siis kuidas? |
Calibration is required when working with manual lenses or lenses that do not support electronic focusing.
Calibration steps: After installing the focus motor, Press the HOME button once to enter the menu, go to Lens – Calibration, tap Focus Motor Initialize and wait for it to finish. |
Milliste toodetega X9 Focus Motor töötab? |
Currently, the X9 Focus Motor works only with the Zenmuse X9. |
Kas X9 gimbal-kaamera võib töötada kolmanda osapoole või Ronini seeria teravustamismootoritega? |
Ei. |
Millist teravustamisseadet X9 Focus Motor kasutab? |
It uses the M0.8 DJI R Focus Gear Strip.
Learn more at: https://store.dji.com/cn/product/ronin-s-focus-gear-strip |
Milliste toodetega 4D-videosaatja töötab? |
Hetkel ainult DJI Ronin 4D-ga. |
Mitme suure eredusega kaugmonitoriga saab 4D-videosaatja korraga ühenduse luua? |
In Control mode, up to two High-Bright Remote Monitors. In Broadcast mode, up to 16 High-Bright Remote Monitors. |
Kuidas installida ja kasutada 4D-videosaatjat? |
Please check the after sales tutorial video Installation and Use of the 4D Video Transmitter. |
Kuidas alustada 4D-videosaatja linkimist? |
To start linking, go to Transmission on the High-Bright Main Monitor menu and then tap Link Device, or hold the linking button on the video transmitter for five seconds. The linking status indicator will then blink red and green alternately. When linking is complete, the linking status indicator turns solid green and the video transmitter can communicate with the High-Bright Remote Monitor. |
Millised on 4D-videosaatja olekuindikaatorite mustrid? |
Blinks red and green alternately: Linking.
Solid green: Linking successful. Wireless video transmission is normal. Solid red: The device is powered on without connection. Blinks red: The device has internal abnormality. |
Milliste toodetega High-Bright Remote Monitor töötab? |
Hetkel ainult DJI Ronin 4D-ga. |
Kas High-Bright Remote Monitor toetab Wi-Fi ja Bluetoothi? |
Hetkel ei. |
Milliseid eraldusvõimeid ja kaadrisagedusi toetab kaugmonitori laiendusplaadi HDMI-port? Kas see toetab videosisendit? |
See toetab kuni 1080p/60 kaadrit sekundis videoväljundit ja praegu ei toeta HDMI-sisendit. |
Mille poolest erineb DJI O3 Pro DJI O3-st? |
DJI O3 is used mainly on drones, whereas DJI O3 Pro is specialized mainly for enhancing anti-interference for ground shooting. It supports control by up to two monitors at the same time, and has added DFS frequency band support.*
* Not available in certain countries and regions. |
Kas ma saan 4D-videosaatja eraldi keelata? |
Hetkel ei. |
Mis vahe on DJI O3 Pro leviedastusrežiimil ja juhtimisrežiimil? |
In Control mode, the user can remotely control the recording of Ronin 4D and change parameters such as ND filters, EI, Iris, and white balance with the High-Bright Remote Monitor, and can remotely control the gimbal with DJI Master Wheels or DJI Force Pro via the High-Bright Remote Monitor Expansion Plate . Broadcast mode only supports monitoring and monitor switching between different devices, and does not support remote control and parameter setting. |
Kas DJI O3 Pro segab juhtmeta mikrofone? |
DJI O3 Pro may interfere with wireless mics that occupy the same radio frequency band as the one being used by DJI O3 Pro. If your wireless mic experiences frequent disconnection and unstable audio recording, try manually switching DJI O3 Pro to another channel on the remote monitor to eliminate the interference from DJI O3 Pro. |
Millist CFexpress 2.0 Type-B mälukaarti DJI Ronin 4D toetab? |
Please see below for currently supported models. More models will be added in the future. |
Millist USB-C SSD-d DJI Ronin 4D toetab? |
Praegu toetatud mudelite kohta vaadake allpool. Tulevikus lisandub rohkem mudeleid. |
Kuidas PROSSD kinnitust ja PROSSD-d installida ja kasutada? |
1. Open the CFexpress card slot cover, press the quick release button inside, and remove the cover.
2. Locate the mark on the CFexpress card connector and insert it into the card slot of Ronin 4D based on the direction of the mark. 3. Remove the two M2x5 screws on Ronin 4D, align the PROSSD Mount with the screw holes, and attach using the M2x22 screws included in the package. |
Kas PROSSD kinnitus toetab teisi tooteid? |
Hetkel ainult DJI Ronin 4D-ga. |
Kuidas kontrollida PROSSD järelejäänud mahtu ja võtteaega? |
Järelejäänud võtteaega saate kontrollida põhiekraani vasakus ülanurgas. Ülejäänud mahu ja võtteaja kontrollimiseks võite minna ka AVALEHT -> Salvestusruum. . |
Kuidas eksportida andmeid PROSSD-lt? |
Saate kasutada kaasasolevat USB-C–USB-C andmekaablit PROSSD ühendamiseks arvutiga ja andmete eksportimiseks. |
Kuidas PROSSD-d vormindada? |
PROSSD vormindamiseks avage põhisätted, toksake Salvestusruum ja seejärel puudutage Format. Seejärel vajutage ja hoidke all punast nuppu, kuni edenemisriba on vormindamise lõpetamiseks täis. Märkus: PROSSD-kaarti saab vormindada ainult DJI Ronin 4D abil. ÄRGE eemaldage kaarti vormindamise ajal. |
Millised on PROSSD levinumad olekuindikaatori mustrid? |
Ühtlane valge: ooterežiimis. Vilgub valgelt: andmete lugemine/kirjutamine. |
Kui kaua saan filmida suurima kaadrisagedusega videot Apple ProRes RAW-vormingus DJI PROSSD 1TB abil? |
DJI PROSSD 1TB suudab salvestada 6008 × 3168 48 kaadrit sekundis Apple ProRes RAW videot umbes 36 minutit või 8192 × 4320 60 kaadrit sekundis Apple ProRes RAW videot umbes 31 minutit. |
Kas PROSSD kinnitus toetab kolmanda osapoole SSD-d? |
Ei. |
Tehnilised andmed
General | Note | ||
Main Body Dimensions (length×width×height) | 235×115×160 mm | ||
Overall Dimensions (length×width×height) | 309×290×277 mm* | Measured when 6K Combo is fully set up with the main monitor attached and the Z-Axis off. | |
Gimbal Weight | Approx. 1.04 kg | ||
Main Body Weight | Approx. 1.45 kg | ||
Overall Weight | Approx. 4.67 kg (after installing all modules in the combo, excluding lens and storage card) | ||
Max Operating Time | Approx. 150 minutes* | Measured with a fully charged TB50 Battery and Ronin 4D in a still state with the gimbal balanced, the Z-Axis inactive, and continuously recording in RAW. Gimbal movements or use of the Z-Axis will reduce operating time. | |
Intelligent Features | ActiveTrack Pro, Autofocus (supports human face/body recognition and framing of any subject) | ||
Storage Temperature | -20° to 60° C (-4° to 140° F) | ||
Operating Temperature | -10° to 40° C (14° to 104° F) | ||
Camera | |||
Sensor Size | 35mm full-frame CMOS image sensor | ||
Base Lens Mount | DX Mount, and support for other mount units | ||
Supported Lens Mounts | DL Mount (standard), M Mount, and E Mount | ||
DL Lens | DJI DL 24mm F2.8 LS ASPH DJI DL 35mm F2.8 LS ASPH DJI DL 50mm F2.8 LS ASPH |
||
Dynamic Range | 14+ stops | ||
White Balance | Manual 2,000-11,000 Kelvin and tint adjustment, supports AWB | ||
Gamma | D-Log, Rec.709, HLG | ||
EI Range | X9-8K: EI 200-12800, Dual Native ISO 800/4000 X9-6K: EI 200-12800, Dual Native ISO 800/5000 |
||
Shutter Speed | Electronic Rolling Shutter 1/24s-1/8000s | ||
ND | Built-in 9-stop ND filters: Clear, 2 (0.3), 4 (0.6), 8 (0.9), 16 (1.2), 32 (1.5),64 (1.8), 128 (2.1), 256 (2.4), 512 (2.7) |
||
Focus Control* | Autofocus, Manual Focus, Automated Manual Focus | Autofocus on manual lenses requires DJI Zenmuse X9 Focus Motor. | |
X9-6K Max Bit Rate | 6008×3168, 48fps RAW 3.4Gbps |
||
X9-8K Max Bit Rate | 8192×4320, 60fps RAW 3.95Gbps |
||
Supported File System | exFAT | ||
Recording Format | Apple ProRes RAW HQ/Apple ProRes RAW Apple ProRes 422 HQ/Apple ProRes 422* H.264 (4:2:0 10-bit) View detailed list |
Supported through a future firmware update. | |
Storage Media | DJI PROSSD 1TB, CFexpress 2.0 Type B, USB-C SSD | ||
DJI PROSSD 1TB Recording Format | No restriction on recording format | ||
CFexpress 2.0 Type B Recording Format* | ProRes 422 HQ: 6K: 23.976/24/25/29.97/30fps C4K: 23.976/24/25/29.97/30/48/50/59.94/60/72/96/100/120fps 2K: 23.976/24/25/29.97/30/48/50/59.94/60/72/96/100/120fpsH.264: C4K: 23.976/24/25/29.97/30/48/50/59.94/60/72/96/100/120fps 2K: 23.976/24/25/29.97/30/48/50/59.94/60/72/96/100/120fps |
Please use reccommended CFexpress cards. | |
USB-C SSD Recording Format* | ProRes 422 HQ: C4K: 23.976/24/25/29.97/30/48/50/59.94/60fps 2K: 23.976/24/25/29.97/30/48/50/59.94/60fpsH.264: C4K: 23.976/24/25/29.97/30/48/50/59.94/60fps 2K: 23.976/24/25/29.97/30/48/50/59.94/60fps |
Please use reccommended USB-C SSD. | |
Built-in Mic | Built-in 2-ch stereo | ||
Audio Format | LPCM 2-ch, 24-bit 48kHz | ||
Gimbal | |||
Mechanical Range
|
Pan: ±330° | ||
Tilt: -75° to 175° | |||
Roll: -90° to 230° | |||
Z-Axis Range: approx 130mm* | Stabilization range of the Z-Axis is subject to change based on Z-Axis modes and usage scenarios and may be smaller than the mechanical range. | ||
Controllable Range
|
Pan: ±285° | ||
Tilt: -55° to +155° | |||
Roll: ±35° | |||
Max Control Speed (°/s) | DJI Master Wheels or DJI Force Pro: Tilt: 360°/s Roll: 360°/s Pan: 360°/s Ronin 4D Hand Grip: Tilt: 120°/s Roll: 120°/s Pan: 120°/s |
||
Maximum Z-axis Payload | 2000 g (including 1040 g gimbal) | ||
Angular Vibration Range | ±0.01° | ||
LiDAR Range Finder
|
|||
Weight | 88 g | ||
Dimensions (length×width×height) | 71×47×34 mm | ||
Operating Temperature | -10° to 40° C (14° to 104° F) | ||
LiDAR Range Measurement Precision | 0.3-1m (±1%) 1-10m (±1.5%) |
||
FOV* | 30cm to 3m @>18% reflectivity 60° (horizontal) × 45° (vertical) 30cm to 10m @>18% reflectivity 60° (horizontal) × 7° (vertical) |
||
Safety Rating | Class 1 (IEC 60825-1:2014) (safe for human eyes) | ||
Operating Environment | Use in environments with diffuse reflective surfaces (>10%, such as walls, trees, people, etc.) DO NOT use in environments with dense fog or aim it at or through glass surfaces. |
||
Laser Wavelength | 940 nm | ||
Single Pulse Width | Two kinds of pulses emit in circulation: 5ns and 33.4ns. | ||
Max Laser Power | 6 W | ||
Main Monitor | |||
Screen Size | 5.5 inches (diagonal) | ||
Resolution | 1920×1080 | ||
Refresh Rate | 60Hz | ||
Max Brightness | 1000 cd/m² | ||
Screen | Rotational LCD touchscreen | ||
Battery | |||
Battery Type | TB50 Intelligent Battery | ||
Capacity | 4280 mAh | ||
Energy | 97.58 Wh | ||
Voltage | 22.8 V | ||
Max Charging Voltage | 26.1 V | ||
Max Charging Power | 180 W | ||
Charging Temperature Range | 5° to 40° C (41° to 104° F) | ||
Charging Time | Approx. 1.5 hours (with standard 86W power adapter) | ||
DJI O3 Pro Video Transmission
|
|||
Max Transmission Distance | 20,000 ft (approx. 6km, FCC-compliant)* | Unobstructed, free of interference. | |
Max Transmission Resolution and Frame Rate | 1920×1080 @60fps | ||
Minimum End-to-End Latency | 100 ms or 68 ms* | 100ms is measured at 4K/24fps, 68ms is measured at 4K/60fps. | |
Wireless Frequency
|
Non DFS frequency band: 2.400-2.483 GHz 5.150-5.250 GHz 5.725-5.850 GHz: |
||
DFS Frequency Band*: 5.250-5.350 GHz 5.470-5.600 GHz 5.650-5.725 GHz |
Some frequency bands may not be available depending on the legal policies of the region the monitor was activated in. | ||
Transmitter Power (EIRP) | 2.400-2.4835 GHz: ≤33 dBm (FCC); ≤20 dBm (SRRC/CE/MIC) 5.150-5.250 GHz <23 dBm (FCC/SRRC/CE/MIC) 5.250-5.350 GHz: <30 dBm (FCC); <23 dBm (SRRC/CE/MIC) 5.470-5.600 GHz, 5.650-5.725 GHz: <30 dBm (FCC);<23 dBm (CE/MIC) 5.725-5.850 GHz: <33 dBm (FCC); <14 dBm (CE); <23 dBm (SRRC) |
||
Max Bandwidth | 40 MHz | ||
Max Bitrate | 50 Mbps | ||
Interface | |||
Main Body
|
3.5mm TRS Stereo Input Jack × 1 (supports mic, plug-in power mic, and line inputs) | ||
3.5mm Stereo Output Jack × 1 | |||
USB3.1 Type-C Data Port × 1 | |||
6-pin 1B DC-IN (DC 12-30 V) × 1 | |||
Battery Mount Power Port (female) × 1 | |||
4D Expansion Plate Data Port (female) × 1 | |||
High-Bright Main Monitor Port × 1 | |||
Hand Grips Port × 2 | |||
Top Handle Port × 1 | |||
HDMI Type-A Video Output Port × 1* | Currently supports HDMI 1.4 and will support HDMI 2.0 in a future firmware update. | ||
X9 Gimbal | LiDAR Range Finder/ Focus Motor Port × 2 | ||
TB50 Battery Mount
|
Battery Mount Power Port (male) × 1 | ||
TB50 Battery Port × 1 | |||
4D Video Transmitter
|
|||
Dimensions | 89×21×137 mm | ||
4D Video Transmitter Port
|
4D Expansion Plate Data Port (male) × 1 | ||
SMA Antenna Connector × 4 | |||
USB 3.1 Type-C Data Port × 1 | |||
Battery Mount Power Port (female) × 1 | |||
Battery Mount Power Port (male) × 1 | |||
Remote Monitor
|
|||
Dimensions | 216×58×166 mm (includes monitor cage) | ||
Screen Size | 7 inches (diagonal) | ||
Max Brightness | 1500 cd/m² | ||
Screen Resolution | 1920×1200 | ||
Refresh Rate | 60Hz | ||
Max Battery Life | Approx. 2 hours* | Measured at 50% screen brightness with DJI WB37 battery. | |
Operating Temperature | 0° to 40° C (32° to 104° F) | ||
Storage Temperature | -20° C to 60° C (-4° to 140° F) | ||
Power System | DJI WB37 Battery/NP-F series Battery (requires NP-F battery adapter) | ||
Remote Monitor Port
|
3.5mm Stereo Jack × 1 | ||
microSD Card Slot × 1* | This port is currently not available. Will support internal recording in a future firmware update. | ||
HDMI Type-A Video Input Port × 1* | This port is currently not available. Will support HDMI 1.4 in a future firmware update. | ||
Remote Monitor Expansion Plate High-Speed Port (female) × 1 | |||
Remote Monitor Accessory Expansion Port × 1 | |||
USB 3.1 Type-C Data Port × 1 | |||
Remote Monitor Expansion Port
|
Remote Monitor Expansion High-Speed Port (male) × 1 | ||
HDMI 1.4 Type-A Video Output Port × 1 | |||
6-pin 1B DC-IN (DC 6.8-17.6 V) × 1 | |||
3G-SDI (Level A) BNC Video Output Port × 1 |
Karbist leiad
Accessories | DJI Ronin 4D 4-Axis Cinema Camera 6K Combo | DJI Ronin 4D 4-Axis Cinema Camera 8K Combo |
Zenmuse X9-8K Gimbal Camera | 0 | 1 |
Zenmuse X9-6K Gimbal Camera | 1 | 0 |
Main Body | 1 | 1 |
LiDAR Range Finder | 1 | 1 |
DL Mount | 1 | 1 |
Left Hand Grip | 1 | 1 |
Right Hand Grip | 1 | 1 |
Top Handle | 1 | 1 |
High-Bright Main Monitor | 1 | 1 |
PROSSD 1TB | 0 | 1 |
PROSSD Mount | 0 | 1 |
TB50 Battery Mount | 1 | 1 |
TB50 Intelligent Battery | 1 | 1 |
Power Adapter | 1 | 1 |
TB50 Charging Adapter | 1 | 1 |
AC Power Cable | 8 | 8 |
LiDAR Range Finder/Focus Motor Cable | 1 | 1 |
USB-A to USB-C Cable | 1 | 1 |
USB-C to USB-C Cable | 0 | 1 |
Base Plate | 1 | 1 |
Hand Grip Extended Control Sticks | 1 | 1 |
3mm Ball-End Hex Key | 1 | 1 |
10mm 1/4″-20 Screw | 3 | 3 |
Flat Head Screwdriver | 1 | 1 |
DL Mount Body Cap | 1 | 1 |
X9 Gimbal Base Cap | 1 | 1 |
DX Mount Body Cap | 1 | 1 |
DX Mount Lens Cap | 1 | 1 |
Ronin 4D Gimbal Base Cap | 1 | 1 |
Left Hand Grip Strap | 1 | 1 |
Right Hand Grip Strap | 1 | 1 |
Ronin 4D Carrying Case | 1 | 1 |
LiDAR Range Finder Quick Start Guide | 1 | 1 |
DJI Ronin 4D Quick Start Guide | 1 | 1 |